Image tool · brush a mask, no prompt
AI Object Remover
Paint over what you want gone, press Erase, and the area is filled in from the rest of the photo.

Erase removes objects from a photo by a mask you draw yourself. You open the photo, paint over the thing you want out of the picture, and Bria Eraser rebuilds that patch from the scene around it: the sand behind a bottle, the floor under a basket, the wall behind a bin. Because you choose the area with a brush, you decide exactly what goes, which matters when an automatic tool would pick the wrong object. There is no prompt to write. It is AI, so the filled area is a plausible guess rather than what was really there, and busy patterns or text behind the object are where it varies most.
Examples
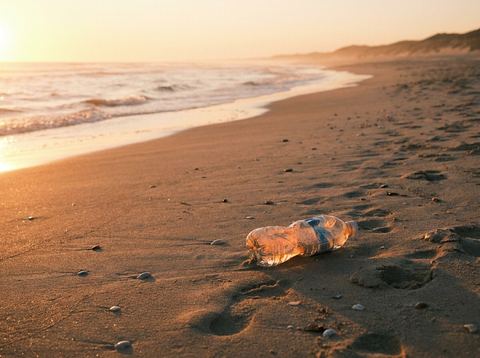
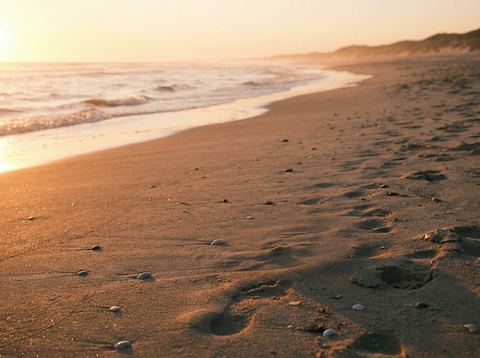
“Brushed over the plastic bottle”
Try it on your own photo ↑

“Brushed over the laundry basket”
Try it on your own photo ↑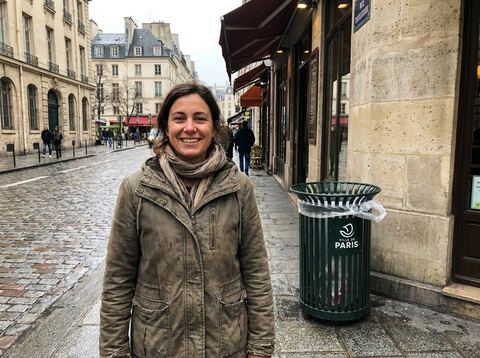
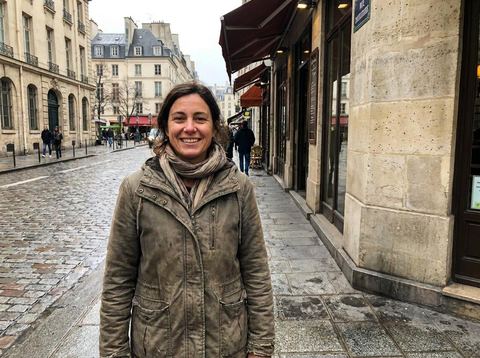
“Brushed over the trash can”
Try it on your own photo ↑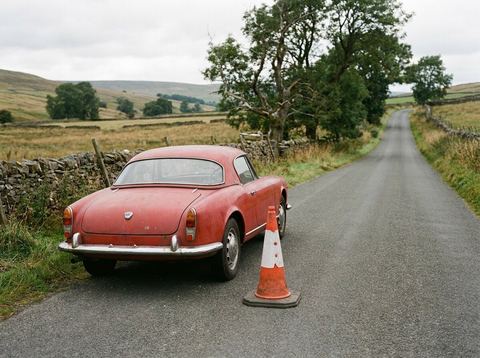
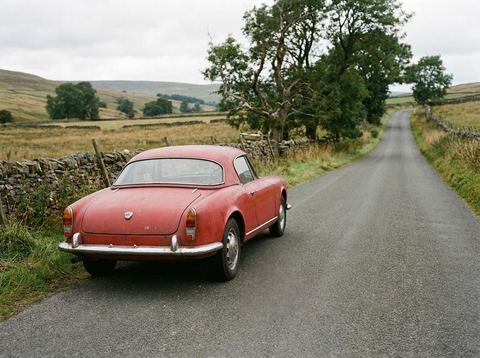
“Brushed over the traffic cone”
Try it on your own photo ↑Why this image tool
A brush you control
The mask is drawn in red over the photo. Brush Size runs from 6 to 120 pixels, so you can sweep a large object in a few strokes and switch to a thin brush for an edge. Undo takes back the last stroke and Clear starts the mask over.
Fill from the surroundings
Bria Eraser looks at the pixels around your mask and continues them into the gap: horizon lines, grass, tiles, fabric. The Erase button stays off until you have drawn something, so a run never goes out without a marked area.
Results land in History
After you press Erase you move to the image workspace, where the job shows a loading placeholder and then the result. From there you can download it, run the same mask again for a different fill, or send the image on to Upscale or Reframe.
How it works
- 1
Upload the photo
Drop an image onto the Upload Photo card or click to choose one. Signed in, you can also pick an earlier image from the rail on the left. The photo opens with the Erase panel ready.
- 2
Paint over the object
Set Brush Size, then cover the object completely, including its shadow and any reflection. Leaving a sliver of the edge unpainted is the most common reason a faint outline stays behind.
- 3
Press Erase
The price shows on the Erase button. Sign in if asked, and the job runs in History. If the fill looks off, run it again or redraw the mask a little wider.
Who it's for
For travel and beach photos
Take a plastic bottle off the sand, a traffic cone off a street scene or a trash can out of a landmark shot, without cropping the view.
For home and rental listings
Clear a laundry basket, a cable or a stray shoe from a room photo before it goes on a listing, so the space reads clean.
For product and social photos
Remove a price sticker, a stray crumb or a hand at the edge of a flat lay, then upscale the cleaned image if it needs to be larger.
More to try



Frequently asked questions
Can it remove people from a photo?
Yes. Brush over the person, their shadow included, and press Erase. If you would rather not draw a mask, Remove People clears bystanders automatically while keeping the main subject.
What if the filled area looks wrong?
Run it again, since each run can fill the area differently. If a ghost of the object remains, widen the mask past its edges and cover its shadow. Large objects in front of detailed backgrounds are the hardest case.
Does it change the rest of the photo?
The model is given your photo and the mask, and it fills the masked area. Parts you did not paint are meant to stay as they were, but compare against the original, especially near the edges of the mask.
Do I type what to remove?
No. Erase works from the mask alone. If you want to put something new in the spot instead of filling it with background, use Replace, which takes a mask and a prompt.
Do I need an account?
Yes, you need to be signed in before an erase runs. The price for one erase shows on the Erase button before you press it.
Try it on your own photo
Pay only for what you generate. The price shows on the button before you start.
Upload a photo